Today, I bought myself my first Raspberry Pi 4B 8GB, for a slightly steep price of 229 dollars on Shopee. Why did I buy it? Firstly, I have been paying USD5 a month (As of last month, the price went up to USD6) for a puny 1GB RAM 25GB SSD Linux virtual private server (VPS) on Digital Ocean and it hosted my personal website for now. For a VPS with 8GB ram, I would have to fork out USD40 a month, so I thought why not just get a Raspberry Pi to host it? I could also use it as a NAS server to store my photos and movies as well by plugging in my hard disk on it, and if one day it outgrow my needs, I could just make a cluster of Raspberry Pi! And do many more things with it! (which I suspect might take awhile to even get there)
This is a three part tutorial that cites relevant tutorial guides that I found online that help me eventually achieve my final goal of self-hosting my personal website.
- Part 1 - RPi Setup (here)
- Part 2 - Flask App with Docker and Portainer
- Part 3 - Domain Name Management with Cloudflare and Nginx Proxy Manager
Hardware setup
The setup was really simple, you take out the motherboard, plug in the 32GB SD card with the Raspberry Pi OS preinstalled by the seller. With the power, monitor, mouse and keyboard plugged into it, all we need to do is the switch it on to boot it up. It can connect to the internet either by WIFI or LAN, but I chose to connect it via WIFI because I don’t want to disconnect it accidentally if I knock it over.
Setting up for SSH connections for Local Access
While you can use the Raspberry Pi like a desktop with a monitor, keyboard and a mouse, most of the time you would rather just access it via SSH like a VPS from whichever device we are more comfortable working on. Firstly, we need to enable the SSH, in my case through the OS GUI.
Once your device boots up:
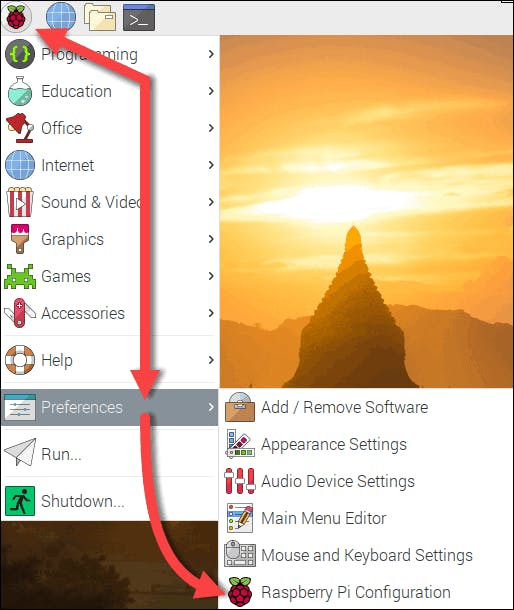
- Click on the raspberry logo at the top-left corner.
- Select Preferences > Raspberry Pi Configuration.

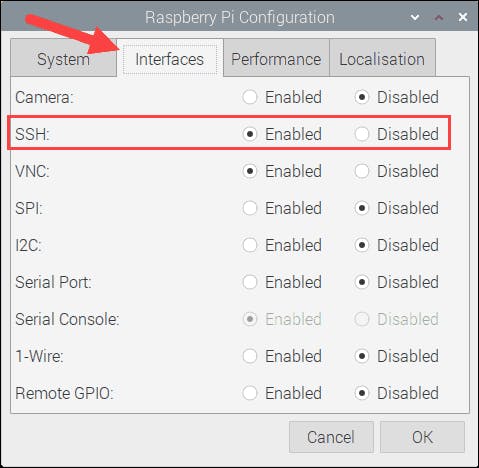
- Navigate to the Interfaces tab in the configuration window.
- Enable SSH in the second line.

There are other ways to enable SSH without the GUI as well from the guide here: How to Enable SSH on Raspberry Pi [Definitive Guide] (phoenixnap.com)
Now you can access your Raspberry Pi (RPi) on devices that are connected on the same wifi network, by typing.
pi@raspberrypi:~$ ssh pi@raspberry
If you have changed the name of the RPi, you can still access it by looking for the private IP address of your RPi in the network by typing ifconfig. The IP address is under eth0 if you connected your RPi via LAN cable, or wlan0 if the RPi is connected via Wifi. It’s good to keep this private IP address in mind because many other frameworks are easily accessible from the internal IP address via different ports.
pi@raspberrypi:~$ ifconfig
pi@raspberrypi:~$
eth0: flags=4099<UP,BROADCAST,MULTICAST>  mtu 1500
        ether <IP here>  txqueuelen 1000  (Ethernet)
        ...
wlan0: flags=4163<UP,BROADCAST,RUNNING,MULTICAST>  mtu 1500
        inet <IP here>  netmask 255.255.255.0  broadcast 192.168.18.255
        ...
Port Forwarding for Remote Access
However, this doesn’t allow us to access our RPi when you leave your home network. In order to expose port 22 in your router so for you to SSH into the RPi while you are outside of your home network, you need to set up port forwarding that is dependent on your router. At the same time, we are going to open port 80 and 443 to eventually allow HTTP and HTTPS request to our RPi later in the tutorial
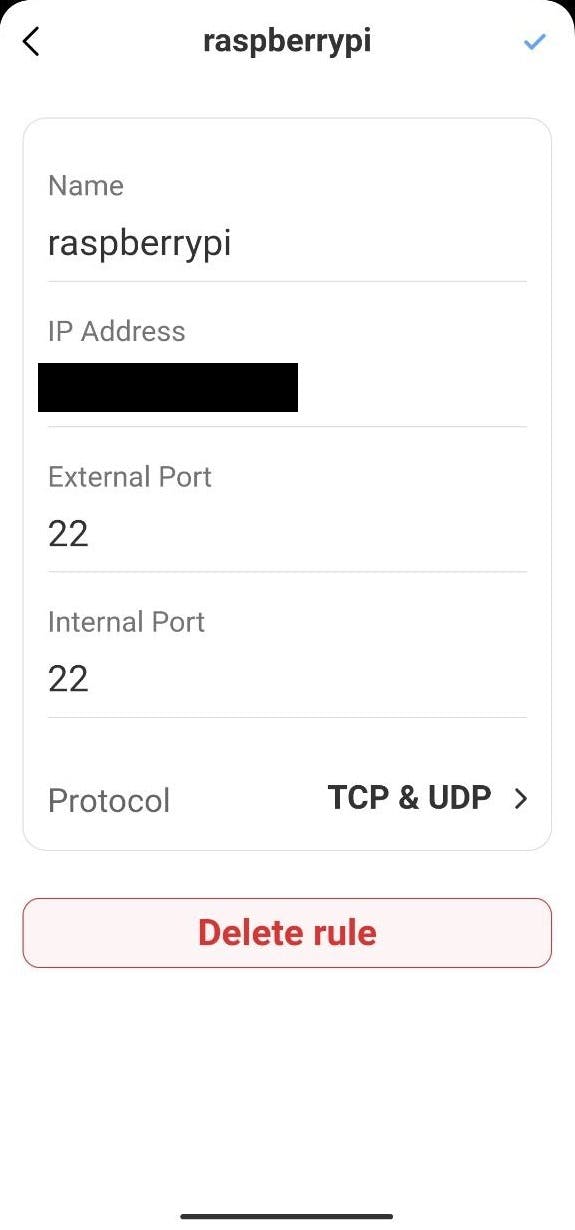
I am using a Nokia Beacon, so there is a convenient phone app that allows me to adjust such settings. You can follow this guide for other routers - How to Port Forward on Your Router : HelloTech How
From my Nokia Beacon App:
- Settings > General > Advanced > Port Forwarding.
- Set External and Internal Port as 22 (Default Port for SSH), do it for 80 and 443 as well.

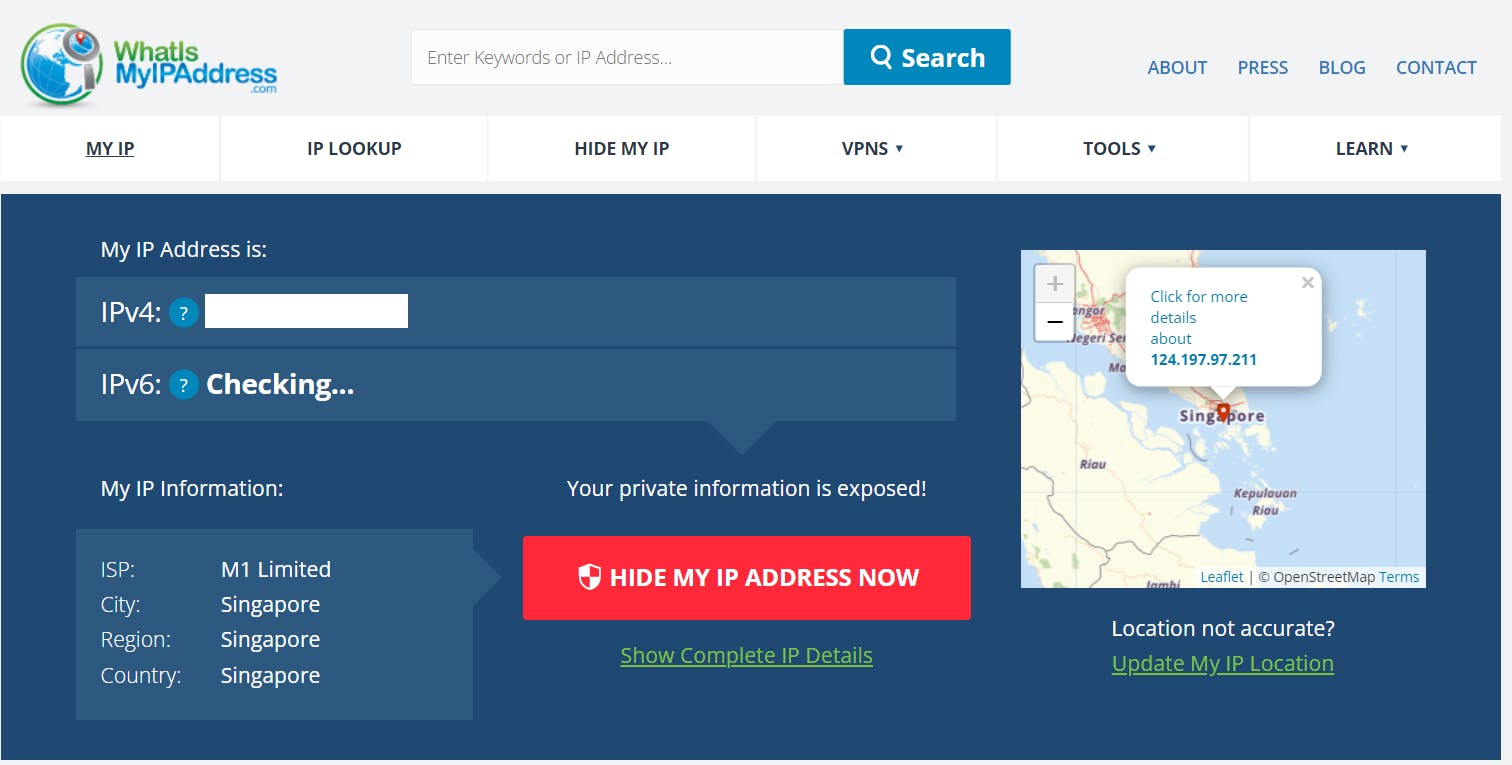
After you set that up, you can find out your public IPv4 address by going to What Is My IP Address - See Your Public Address - IPv4 & IPv6

C:\ ssh pi@<YOUR IP ADDRESS>
It’s good to remember this public IP address because many other frameworks are easily accessible from the public IP address via different ports when you are working with your RPi remotely.
This public IP address will not change unless you reset your router, so you could either request an static IP address from your provider (which is next to impossible in Singapore) or you could employ Cloudflare DDNS API to update your public IP address when it does change. That is a topic for another day.
So in this part of the tutorial we managed to do the below:
1) Set up SSH for the RPi for you to access it on the same home network via its private IP address 2) Set up Port Forwarding for you to access your RPi remotely, via its public IP address


